
Remember those frantic weeknights when only a pure, unadulterated crunch could save dinner? That seemingly impossible-to-replicate golden coating from your favorite childhood restaurant has finally been perfected.
Prepare yourself, because we are about to unveil the foolproof secrets to makingCrispy Chicken Fingers: The Ultimate Recipe for Perfectly Crunchy Bites, guaranteed to silence even the most notoriously picky eaters at your table.
- Achieve a spectacular, restaurant-quality crunch without relying on messy deep frying, utilizing simple pantry staples and an effective triple-dredging technique for maximum texture.
- A deeply savory buttermilk substitute ensures the chicken remains incredibly tender and juicy on the inside, providing a perfect counterpoint to the shatteringly crunchy exterior.
- These golden, perfectly textured poultry strips look absolutely stunning on any plate, promising an appetizer or main course that delivers maximum visual appeal.
- Delicious served with tangy honey-mustard, creamy ranch dressing, or a spicy homemade glaze, these crunchy chicken strips are versatile for parties or quick weeknight meals.
Ingredients for Crispy Chicken Fingers: The Ultimate Recipe for Perfectly Crunchy Bites
Here’s what you’ll need to make this delicious dish:
- Chicken Tenderloins or BreastsSelect high-quality, boneless, skinless chicken, cut into uniform 1-inch strips to ensure even cooking and maximum surface area for the coating.
- Buttermilk SubstituteUse a mixture of milk and a tablespoon of white vinegar or lemon juice; this acid tenderizes the chicken fibers, keeping the meat moist during cooking.
- All-Purpose FlourThis forms the foundational layer for the breading, helping the seasoning and subsequent layers adhere strongly to the chicken.
- Panko BreadcrumbsPanko is the secret weapon for ultimate crunchiness, featuring a lighter, airier texture than traditional breadcrumbs that prevents sogginess.
- Egg WashA simple mix of eggs and a splash of water acts as the critical binder, securing the dry mixture onto the marinated poultry.
- Spice BlendA robust combination of paprika, garlic powder, onion powder, and dried thyme elevates the flavor profile beyond basic salt and pepper.
- Neutral Cooking OilChoose an oil with a high smoke point, such as vegetable, canola, or sunflower oil, necessary for achieving that beautiful golden color and internal moisture retention.
The full ingredients list, including precise measurements, is provided in the recipe card directly below.
How to Make Crispy Chicken Fingers: The Ultimate Recipe for Perfectly Crunchy Bites
Follow these simple steps to prepare this delicious dish:
-
Step 1: The Flavor Bath (Marination)
Pat the chicken strips dry, then place them in a resealable bag or shallow bowl. Pour the buttermilk substitute over the chicken, ensuring everything is fully submerged. Add half of your prepared spice blend to the marinade. Seal the bag and refrigerate for at least 30 minutes, or ideally up to 4 hours, which guarantees truly tender meat.
-
Step 2: Set Up the Dredging Stations
While the chicken marinates, prepare your three separate dredging stations. In the first dish, whisk together the flour, the remaining spice blend, salt, and black pepper. In the second dish, whisk the eggs and water for the egg wash. In the third dish, spread the Panko breadcrumbs evenly.
-
Step 3: The Crunchification Process
Working one piece at a time, remove the chicken from the marinade, allowing any excess liquid to drip off. First, dredge the strip completely in the seasoned flour, shaking off the excess. Second, dip it into the egg wash, letting extra liquid run off. Third, press the chicken firmly into the Panko breadcrumbs, ensuring the entire surface is thickly coated. Repeat this process for all strips.
-
Step 4: The Golden Fry or Bake Prep
To fry: Pour about one inch of cooking oil into a large, heavy-bottomed pan and heat it over medium-high heat until it reaches 350°F (175°C). To bake: Preheat your oven to 425°F (220°C). Line a baking sheet with parchment paper and place a wire rack on top. Lightly spray the coated chicken strips with cooking oil spray.
-
Step 5: Cooking for Maximum Crisp
If frying, cook the chicken in batches for 3 to 4 minutes per side until deeply golden brown and cooked through (internal temperature of 165°F or 74°C). If baking, arrange the strips on the wire rack and bake for 18–22 minutes, flipping halfway through, until golden and crunchy.
-
Step 6: Resting and Serving
Transfer the finished chicken fingers to a paper towel-lined plate to drain any residual oil. Wait 5 minutes before serving to allow the internal juices to redistribute. Transfer to plates and serve immediately alongside your favorite dipping sauces for the ultimate finishing touch.
Why These Crunchy Bites Are Better Than Takeout
I spent years chasing the elusive “perfect crunch.” My early attempts at homemade poultry strips resulted in sad, soggy failures that tasted vaguely of desperation and slightly burnt oil. One particularly embarrassing dinner saw my spouse politely trying to snap a piece only for it to bend like rubber. That night, I vowed to crack the code, and the key, my friends, is all in the layers and the breadcrumb choice. You need armor, not just a thin jacket, for truly satisfying poultry bites.
This recipe provides that armor. By employing the classic triple dredge—flour, egg, and then the star, Panko—we build up a robust structure that locks in moisture while providing countless little nooks and crannies for oil (or heat, if baking) to create that shattering texture. Skip any recipe that only calls for one coating layer; that’s where the sogginess monster hides, waiting to ruin your dinner ambitions. Furthermore, the quick marinade ensures that even if you slightly overcook them, the chicken strips remain juicy enough to forgive your minor kitchen sins.
The Science Behind the Golden Crust
Achieving maximum crispiness isn’t magic; it’s basic food science. The Panko breadcrumb is designed specifically for this task because it has a large, flaky structure that absorbs less moisture from the air and the chicken itself compared to fine breadcrumbs. When it hits the heat, these flakes rigidify instantly, creating thousands of tiny air pockets. If you are baking these fingers, utilizing a wire rack is essential. Elevating the chicken allows air to circulate completely around the strips, preventing the bottom side from becoming steamed and yielding that disappointing softness.
Another crucial step often skipped is double-coating the chicken in flour before the egg wash. While we don’t double coat in this recipe, the initial dredge in seasoned flour creates a dry, textured surface that the wet egg wash can cling to tightly. This connection ensures that the final Panko layer sticks permanently. If your coating frequently peels off, chances are you skipped the initial pat-dry or failed to press the Panko firmly enough during the coating stage. Think of it as gently cementing the crunch onto the chicken.
Mastering the Perfect Dipping Sauce Trio
What are delicious chicken strips without equally incredible dipping sauces? Serving the perfect poultry bites requires complementing flavors—you need sweet, savory, and tangy components to truly elevate the meal. Instead of relying on store-bought bottled options, try whipping up one of these simple, fresh sauces.
- Smoky Honey Mustard:Combine equal parts mayonnaise and yellow mustard, then stir in honey until desired sweetness is reached. Add a pinch of liquid smoke flavoring and a dash of cayenne pepper for a vibrant kick.
- Quick Spicy Glaze:Mix tomato ketchup, apple cider vinegar, a small amount of dark brown sugar, and a spoonful of chili paste. Simmer briefly until slightly reduced and sticky for a sweet and sour barbecue alternative.
- Cool Herb Ranch:Stir finely chopped fresh dill, chives, and parsley into sour cream or plain yogurt. Add a touch of garlic powder, salt, and a squeeze of fresh lemon juice for brightness.
Flavor Twists and Variations
While the classic recipe delivers exceptional results, sometimes you want to spice things up or try a different cooking method. These modifications keep the crunchy coating intact while offering new flavor profiles for these delightful golden fingers.
Spice Level Adjustments for Every Palate
If you prefer a fiery kick, introduce heat directly into the flour mixture. Adding a teaspoon of ground cayenne pepper or chili powder to the seasoned flour transforms these from mild bites into spicy wonders. For a smoky, southwestern profile, replace the paprika in the spice blend with smoked paprika and add a quarter teaspoon of cumin. Remember that the buttermilk marinade does slightly mitigate heat, so don’t be afraid to be generous with your seasonings.
Air Fryer Method for Healthier Crunch
If you own an air fryer, this machine is truly your best friend for achieving crispy chicken fingers with minimal oil. Preheat the air fryer to 400°F (200°C). Spray the coated chicken strips lightly with oil spray. Place the strips in a single layer in the basket, ensuring not to overcrowd them. Cook for 10–14 minutes, flipping them halfway through, until they are beautifully golden and crunchy. This method often produces an even more uniform crisp than baking.
How to Prepare a Gluten-Free Coating
You can easily adapt this recipe for those avoiding gluten without sacrificing the crucial crunch. Simply substitute the all-purpose flour with a high-quality gluten-free flour blend. Crucially, replace the traditional Panko breadcrumbs with gluten-free Panko, which is widely available and maintains the essential large, flaky texture required for a successful, shatteringly crisp result.
Frequently Asked Questions (FAQs)
How do I keep the crunchy coating from falling off?
The key steps are ensuring the chicken is patted very dry before marinating, and thoroughly pressing the Panko onto the surface. After coating the strips completely, allow them to rest uncovered on a wire rack for 10 minutes before cooking. This resting period allows the egg wash to ‘set’ the coatings together, drastically reducing peel-off during frying or baking.
Can I bake these chicken strips instead of frying them?
Absolutely, baking is a fantastic and healthier alternative. Follow the baking instructions outlined in Step 4 and Step 5, ensuring you use a wire rack placed over a baking sheet. This setup allows heat to circulate underneath the strips, mimicking the crisping action of frying and preventing a soggy bottom.
What is the best way to store and reheat leftovers?
Store cooked and cooled chicken fingers in an airtight container in the refrigerator for up to 3 days. To reheat them while preserving the crunch, avoid the microwave at all costs! Instead, preheat your oven or air fryer to 350°F (175°C) and reheat the strips for 8–10 minutes until piping hot and re-crisped. They will taste almost as fresh as the day you made them.
The Quest for the Holy Grail of Crunch: Why Your Chicken Tenders Fail (and How to Fix It)
The Great Childhood Dilemma: Soggy vs. Spectacular
We’ve all been there, standing sadly over a plate of takeout chicken tenders, expecting that satisfying shatter, only to be met with a chewy, flaccid tragedy. It’s an injustice! The search for that truly spectacular crunch—the one that echoes through the kitchen—can feel like a mythological quest. For years, I experimented. I double-fried, I triple-dredged, I even tried air-drying the strips on a rooftop (don’t ask). But the secret, as always, wasn’t in complicated maneuvers; it lay in a few simple, often overlooked techniques.
This recipe isn’t just about dipping chicken into oil; it’s about engineering texture. It’s about creating a crust so sturdy, so outrageously crunchy, that you’ll wonder why you ever settled for anything less. Forget sad, greasy strips. We are entering the age of the auditory appetizer. Ready your dipping sauces, because your life is about to change. We’re going beyond mere breading; we are building armor for these perfect chicken tenders.
The Secret Weapon: The Buttermilk Soak and the Flake Factor
The foundation of any great chicken finger is the prep work. Marinating the chicken in buttermilk (or a milk/vinegar mixture for the same effect) achieves two critical goals: tenderness and adhesion. The lactic acid gently breaks down the proteins, ensuring every bite is moist and juicy on the inside. But the true magic happens in the coating.
Most recipes use standard flour and breadcrumbs. We are upgrading. We use a combination of pantry staples, including flour mixed with specific starches and seasonings, which gives us that initial strong base. The second coat is where the ‘flake factor’ comes in. Using panko breadcrumbs, combined with a secret technique involving small amounts of reserved wet mixture, creates tiny clusters of super-crunchy coating. When these hit the hot oil, they expand and solidify into a delicious, rugged shell. This technique is non-negotiable if you want the ultimate crispy bites.
Ingredients for Truly Exceptional Crispy Chicken Fingers: The Ultimate Recipe for Perfectly Crunchy Bites
This list provides everything you need to execute crunchy perfection. Always measure accurately for the best results, especially when dealing with the dry coatings.
For the Chicken Preparation:
- 1.5 lbs boneless, skinless chicken breast or tenders (cut into 1-inch thick strips)
- 2 cups buttermilk (or 2 cups whole milk mixed with 2 tablespoons lemon juice or white vinegar)
- 1 tablespoon hot sauce (optional, for flavor, not heat)
- 1 teaspoon salt
- 0.5 teaspoon black pepper
For the Dry Dredge (Mixture 1):
- 1.5 cups all-purpose flour
- 0.5 cup cornstarch (essential for crispiness!)
- 1 tablespoon smoked paprika
- 1 teaspoon garlic powder
- 1 teaspoon onion powder
- 1 teaspoon salt
For the Crunchy Coating (Mixture 2):
- 3 cups Panko breadcrumbs
- 1 teaspoon dried oregano
- 1 teaspoon cayenne pepper (optional)
For Cooking:
- 6 cups neutral cooking oil (canola, peanut, or vegetable oil)
The Blueprint for Battering Brilliance
Follow these steps precisely to ensure maximum adhesion and texture. Preparation is everything when aiming for those ultimate crispy bites.
Step 1: The Buttermilk Spa Treatment
Combine the buttermilk, hot sauce, salt, and pepper in a medium bowl. Add the chicken strips, ensuring they are fully submerged. Cover the bowl and refrigerate for at least 30 minutes, or up to 4 hours. The longer they soak, the tenderer they become.
Step 2: Setting up the Dredging Stations
Set up a three-station dredging system. In the first shallow dish, combine all ingredients for the Dry Dredge (Mixture 1). In the second dish, place the marinated chicken, allowing excess buttermilk to drip off slightly. In the third shallow dish, combine the Panko breadcrumbs and seasonings (Mixture 2).
Step 3: The Triple Coat Technique
Take a chicken piece and dredge it thoroughly in Mixture 1 (flour/cornstarch mix), shaking off excess. Return it to the buttermilk mixture for a quick, sloppy dip (the second wet layer). Now, and this is the crucial part for the ultimate crunch, immediately press the piece firmly into Mixture 2 (Panko). Use your hands to really pack those panko flakes onto the chicken. Place the coated chicken on a wire rack set over a baking sheet. Repeat until all chicken is coated.
Let the coated chicken rest for 15 minutes. This rest period is vital. It allows the breading to hydrate and bond to the chicken, preventing the coating from falling off when it hits the hot oil. Patience is key to achieving true perfection.
Step 4: Achieving Golden Crunch
Pour the cooking oil into a heavy-bottomed pot or Dutch oven, ensuring it is at least 2 inches deep. Heat the oil to 350°F (175°C). Use a thermometer to maintain this temperature; fluctuations destroy crunch. Carefully place 4-5 chicken fingers into the hot oil, making sure not to overcrowd the pot, which lowers the oil temperature.
Fry the chicken for 5 to 7 minutes, flipping halfway through, until they are deep golden brown and the internal temperature reaches 165°F (74°C). Remove the finished pieces using tongs and place them back on the wire rack (not paper towels, as this steams the bottom and kills the crunch!). Sprinkle immediately with a little extra salt while they are hot. Serve immediately with your favorite dipping sauces.
Perfecting the Cooking Process

Maximize your efficiency by setting up the three dredging stations before the oil heats up. Start heating the oil only after all the chicken pieces have rested for the required 15 minutes. This sequence ensures you move seamlessly from resting to frying, guaranteeing the crust sets perfectly.
Add Your Touch
Experiment with seasoning swaps; try adding dried dill and lemon zest to the Panko mix for a Mediterranean flair, or use chili powder and cumin for a smoky kick. You can swap chicken for turkey tenders easily. For plant-based dips, try a mango chutney or a spicy vinegar-based glaze instead of traditional ranch.
Storing & Reheating
Store leftover chicken fingers in an airtight container in the refrigerator for up to three days. To revive the crunch, always reheat them in a preheated oven or an air fryer at 375°F (190°C) for 8-10 minutes. Avoid the microwave at all costs, unless you enjoy sad, rubbery textures.
I remember serving these crunchy chicken strips at a huge neighborhood cookout last summer. My picky niece, who usually only eats plain pasta, asked if I could package up all the leftovers just for her. That, my friends, is the highest compliment a chef can receive.
The Chef’s Essential Tips for the Perfect Batch
- When using the oil, make sure you maintain a stable temperature of exactly 350°F; fluctuating heat leads to greasy, soggy coating.
- Always let the coated chicken strips rest for at least 15 minutes before frying to ensure the coating fully adheres to the meat.
- Never skip the cornstarch in the initial flour mixture; it absorbs moisture and creates the structural integrity required for maximum crispiness.
Frequently Asked Questions About Crispy Chicken Fingers: The Ultimate Recipe
How long should I marinate the chicken for the best texture?
You should marinate the chicken for a minimum of 30 minutes to tenderize the meat, but soaking it for up to four hours will yield even juicier and more flavorful results.
Can I bake or air-fry these instead of deep-frying?
Yes, you can! For equally satisfying crunch, preheat your air fryer to 400°F (200°C) and cook for 12-15 minutes, or bake at 425°F (220°C) for 20 minutes, flipping halfway through.
What is the purpose of cornstarch in the dry mixture?
Cornstarch is a secret weapon that helps reduce gluten development in the flour, resulting in a lighter, drier coating that browns beautifully and stays much crisper than flour alone.
What kind of oil is best for frying the chicken fingers?
Use a neutral oil with a high smoke point, such as canola, vegetable, or peanut oil. These oils won’t impart unwanted flavors and can handle the required frying temperature.
How do I prevent the breading from falling off during frying?
The keys are two-fold: ensuring the chicken is double-dipped (dry-wet-dry) and, most importantly, allowing the coated pieces to rest for 15 minutes before they hit the hot oil.
The Grand Finale of Crunch
Mastering the art of crunchy chicken tenders requires respect for the process, a love for high-quality Panko, and a commitment to temperature control. Once you realize that the difference between an average strip and these incredible, truly crispy chicken fingers is just a matter of technique—specifically the double-dredging and the resting period—you will never look back. These aren’t just snacks; they are the gold standard of comfort food, designed to elicit immediate happiness and that loud, satisfying crunch we all crave. So grab your aprons, heat that oil, and prepare to deliver perfectly crunchy bites that will impress even the toughest critics in your household.
Conclusion for Crispy Chicken Fingers: The Ultimate Recipe for Perfectly Crunchy Bites
You are now fully armed with the knowledge required to conquer bland poultry forever. Making truly perfect chicken fingers requires patience, especially during the crucial step of chilling the breaded strips. Remember, achieving those perfectly crunchy bites means focusing intently on proper dredging technique and using sustained high heat, whether you choose to bake, air fry, or pan-fry them. This straightforward recipe proves definitively that you don’t need a fancy restaurant kitchen or complicated equipment to create spectacular, golden-brown results at home. Go forth and deliver the definitive batch of Crispy Chicken Fingers: The Ultimate Recipe for Perfectly Crunchy Bites to your delighted friends and family. Enjoy every glorious crunch!
Print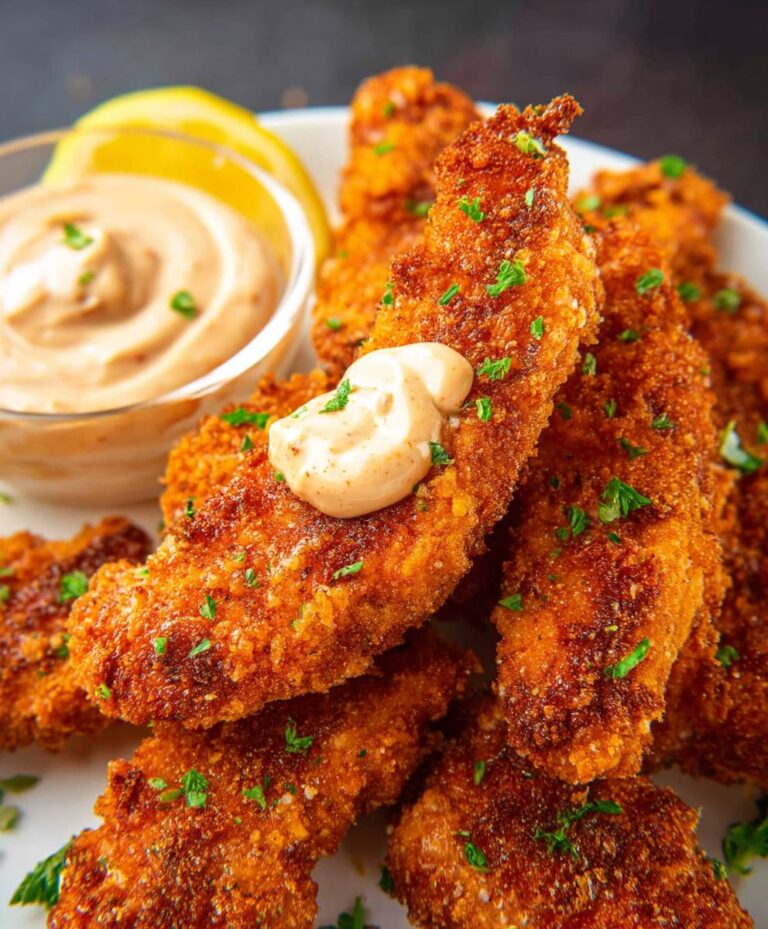
Crispy Chicken Fingers: The Ultimate Recipe for Perfectly Crunchy Bites
Achieve max crunch with our Panko-powered, triple-dredge chicken fingers. We detail how flour, egg wash, and seasoned Panko yield flawless texture every time.
- Total Time: 35 minutes
- Yield: 4 servings 1x
Ingredients
- 1.5 pounds boneless, skinless chicken breasts (cut into 1-inch strips)
- 2 cups Panko breadcrumbs
- 1 cup all-purpose flour
- 2 large eggs
- 1/4 cup milk or buttermilk
- 1 tablespoon seasoning blend (salt, pepper, garlic powder, and smoked paprika)
- 3 cups vegetable or canola oil (for frying)
Instructions
- Step 1: Prepare the Dredging Stations. Set up three shallow dishes. In the first dish, place the all-purpose flour mixed with half of the seasoning blend. In the second dish, whisk the eggs and milk until fully combined. In the third dish, combine the Panko breadcrumbs with the remaining half of the seasoning blend.
- Step 2: Coat the Chicken. Working one strip at a time, dredge the chicken first in the flour mixture, shaking off any excess. Next, dip the chicken completely into the egg wash. Finally, firmly press the strip into the seasoned Panko breadcrumbs, ensuring the entire surface is heavily coated for maximum crispiness. Place the coated fingers on a baking sheet.
- Step 3: Preheat the Oil. Pour the vegetable or canola oil into a deep, heavy-bottomed pot or Dutch oven and heat to 350°F (175°C). Use a cooking thermometer to monitor the temperature; the oil should be hot enough to sizzle immediately but not smoke.
- Step 4: Fry the Chicken. Carefully place 4–5 chicken fingers into the hot oil, ensuring not to overcrowd the pot, which would lower the oil temperature. Fry the strips for 4 to 6 minutes, flipping halfway through, until they are deep golden brown and the internal temperature reaches 165°F (74°C).
- Step 5: Drain and Serve. Using tongs, remove the crispy chicken fingers from the oil and transfer them immediately to a wire rack or a plate lined with paper towels to drain excess grease. Let the oil reheat slightly between batches before continuing to fry the remaining strips. Serve hot with your favorite dipping sauces.
Notes
- For maximum crunch that holds up to frying, place your coated chicken fingers in the freezer for 15-20 minutes before dropping them in the oil; this helps the seasoned Panko adhere perfectly.
- Avoid the microwave entirely; reheat the fingers in a toaster oven or standard oven at 375°F (190°C) for about 8 minutes until sizzling hot and the coating is fully restored to maximum crunch.
- Store cooled leftovers in an airtight container layered between sheets of parchment paper for up to 3 days to prevent sticking and moisture accumulation that ruins the crispy crust.
- While great with simple dipping sauces, these savory fingers truly shine when served alongside a bright, refreshing, crisp coleslaw or a tangy side salad to balance the richness of the frying oil.
- Prep Time: 15 minutes
- Cook Time: 20 minutes
- Method: Stovetop
- Cuisine: American
Nutrition
- Serving Size: 3 chicken tenders (approx. 4 oz cooked)
- Calories: 385
- Sodium: 650mg
- Fat: 18g
- Saturated Fat: 3.5g
- Trans Fat: 0.1g
- Fiber: 1.5g
- Protein: 1g
FAQs
Why does my breading always fall off my chicken fingers?
This is the eternal struggle of the homemade chicken finger enthusiast! The secret lies in the dredging layers and patience. Ensure your chicken is patted completely dry before starting the coating process. Use the standard flour, egg wash, and breadcrumb technique, but here’s the key step: after dredging, let the coated fingers rest on a wire rack in the fridge for at least 30 minutes. This chilling time acts like glue, allowing the moisture in the egg to properly set the breading structure onto the chicken. This crucial rest guarantees your perfectly crunchy bites stay intact when frying or baking.
How can I ensure my Crispy Chicken Fingers are extra crunchy without deep frying?
Achieving that restaurant-quality crunch without gallons of oil is totally doable! If you are baking, the trick involves high heat and strategic placement. Preheat your oven to a robust 425°F (220°C). Spray a wire rack generously with cooking spray and place the chicken on top, allowing vital air to circulate around all sides. For even better results, lightly mist the coated chicken strips themselves with olive oil or cooking spray before placing them in the oven. This small application of oil helps the breading turn a beautiful golden brown and develop that irresistible, shatteringly crisp texture without requiring excessive oil.
Can I prepare these perfectly crunchy bites ahead of time and freeze them?
Absolutely! Chicken fingers are a freezer hero, perfect for quick meal prepping during busy weeks. Follow the recipe instructions right up until the point of cooking. Once the strips are fully breaded, arrange the perfectly crunchy bites on a baking sheet lined with parchment paper, ensuring none of them are touching each other. Freeze them solid for about two hours. Once fully frozen, transfer the strips into a heavy-duty freezer bag or airtight container. When you are ready to cook, simply bake or air fry them directly from frozen, adding about five to ten extra minutes to the standard cooking time.
What are the best dipping sauces to pair with these ultimate crispy chicken fingers?
The right sauce truly completes the ultimate crispy chicken experience! While classic honey mustard is always a reliable winner, feel free to elevate your dipping game beyond the basics. Try whipping up a quick “spicy kick” sauce using mayonnaise, sweet chili sauce, and a dash of cayenne pepper for a creamy, flavorful complement. Another fantastic option is a homemade tangy barbecue sauce utilizing apple cider vinegar and a smoky paprika blend. Remember, the sauce should enhance the golden-brown crust without completely overshadowing the savory flavor of the chicken itself. Have fun experimenting with different flavor profiles!


Leave a Comment