
Oreo Cheesecake Cups: A Delightful Treat
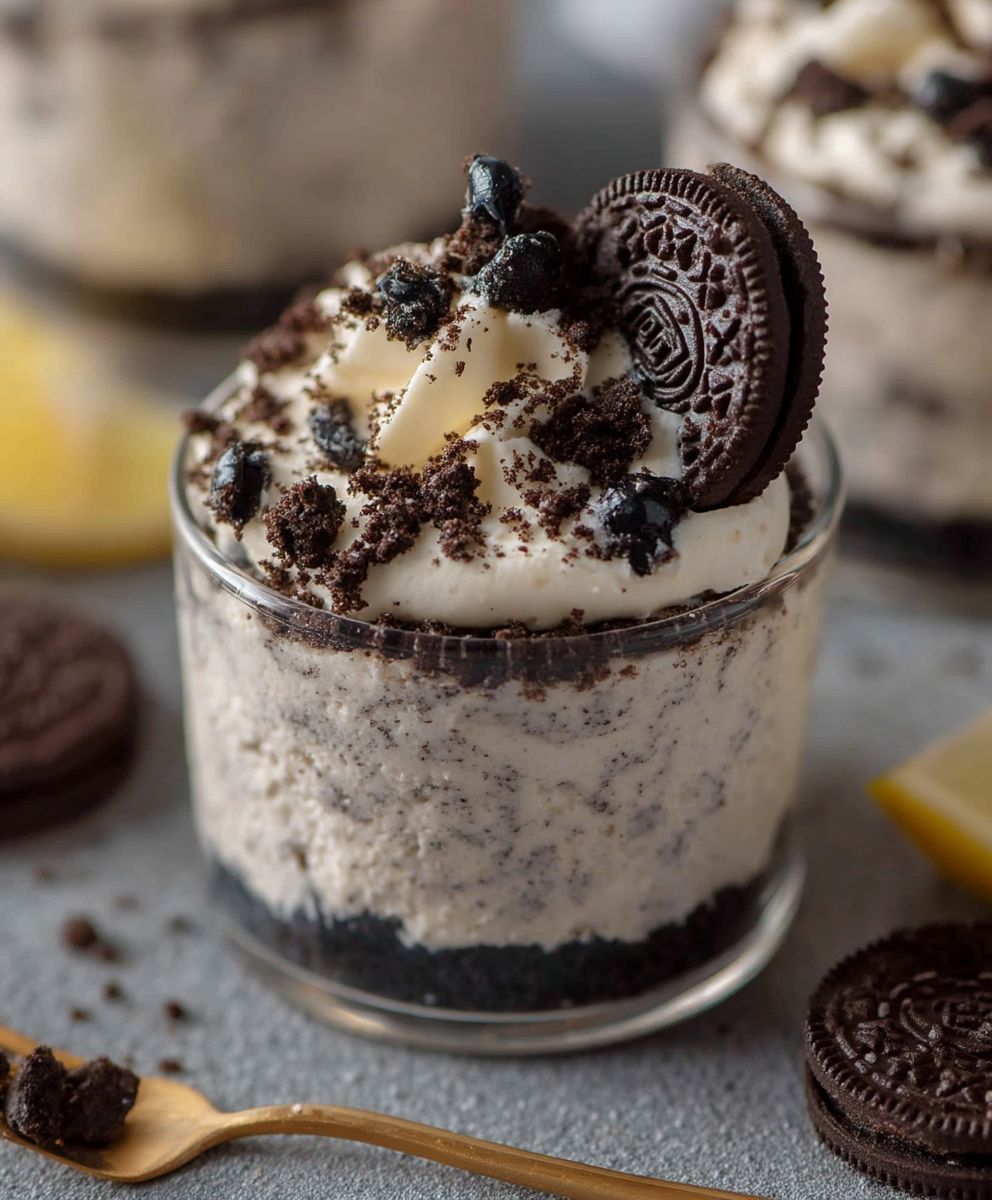
Oreo Cheesecake Cups are the perfect indulgence for any dessert lover. Imagine a creamy, rich cheesecake filling nestled in a crunchy Oreo crust, all served in adorable little cups. This delightful treat not only satisfies your sweet tooth but also brings a touch of elegance to any gathering. Originating from the classic cheesecake, these cups have become a modern favorite, combining the beloved flavors of Oreo cookies with the smooth texture of cheesecake.
People adore Oreo Cheesecake Cups for their incredible taste and convenience. Each bite offers a harmonious blend of sweetness and creaminess, while the Oreo crust adds a satisfying crunch. Whether you’re hosting a party or simply craving a sweet snack, these cups are easy to prepare and serve. Plus, they can be made ahead of time, making them a go-to dessert for busy days. Join me in exploring this delightful recipe that is sure to impress your family and friends!

Ingredients:
- 1 package (15.5 oz) Oreo cookies
- 4 tablespoons unsalted butter, melted
- 2 (8 oz) packages cream cheese, softened
- 1/2 cup granulated sugar
- 1 teaspoon vanilla extract
- 1 cup heavy whipping cream
- 1/4 cup powdered sugar
- Chocolate syrup (for drizzling, optional)
- Additional crushed Oreos (for topping, optional)
Preparing the Crust
- Start by preheating your oven to 350°F (175°C). This will ensure that your crust bakes evenly.
- In a food processor, add the entire package of Oreo cookies. Pulse until they are finely crushed. You want a texture similar to sand.
- In a medium bowl, combine the crushed Oreos with the melted butter. Mix well until all the crumbs are coated with butter.
- Line a muffin tin with cupcake liners. This will make it easier to remove the cheesecake cups later.
- Evenly distribute the Oreo mixture into the bottom of each cupcake liner, pressing down firmly to create a solid crust. You can use the back of a spoon or your fingers to pack it tightly.
- Bake the crusts in the preheated oven for about 10 minutes. Once done, remove them from the oven and let them cool completely while you prepare the cheesecake filling.
Making the Cheesecake Filling
- In a large mixing bowl, beat the softened cream cheese with an electric mixer on medium speed until smooth and creamy. This should take about 2-3 minutes.
- Add the granulated sugar and vanilla extract to the cream cheese. Continue to beat until well combined and fluffy, about another 2 minutes.
- In a separate bowl, whip the heavy cream until soft peaks form. This usually takes about 3-5 minutes with an electric mixer on high speed.
- Gently fold the whipped cream into the cream cheese mixture. Use a spatula to combine, being careful not to deflate the whipped cream. The goal is to keep the mixture light and airy.
- Once fully combined, your cheesecake filling should be smooth and creamy. If desired, you can fold in some crushed Oreos at this stage for added texture and flavor.
Assembling the Cheesecake Cups
- Using a spoon or a piping bag, fill each cupcake liner with the cheesecake filling. Fill them to the top, as they will not rise much during chilling.
- Once all the cups are filled, smooth the tops with a spatula or the back of a spoon for a neat finish.
- Cover the muffin tin with plastic wrap or aluminum foil and place it in the refrigerator. Allow the cheesecake cups to chill for at least 4 hours, or overnight for the best results.
Serving the Oreo Cheesecake Cups
- Once the cheesecake cups have set, carefully remove them from the muffin tin by lifting the cupcake liners.
- Transfer the cheesecake cups to a serving platter or individual dessert plates.
- If desired, drizzle chocolate syrup over the tops of the cheesecake cups for an extra touch of sweetness.
- For added decoration, sprinkle some crushed Oreos on top of each cup. This not only looks appealing but also enhances the Oreo flavor.
- Serve immediately or keep them refrigerated until ready to serve. These cheesecake cups are best enjoyed chilled.
Storage Tips
- If you have any leftovers (which is rare!), store them in an airtight container in the refrigerator. They will stay fresh for up to 3 days.
- For longer storage, you can freeze the cheesecake cups. Just make sure to wrap them tightly in plastic wrap and then place them in a freezer-safe container. They can be frozen for up to 2 months.
- To thaw, simply transfer them to the refrigerator for a few hours before serving.
Variations and Customizations
- Flavor
Conclusion:
In conclusion, these Oreo Cheesecake Cups are an absolute must-try for anyone who loves a delightful blend of creamy cheesecake and the irresistible crunch of Oreos. They are not only easy to make but also incredibly versatile, making them perfect for any occasion, whether it’s a casual family gathering, a birthday party, or just a sweet treat for yourself after a long day. The combination of rich cream cheese, sweet whipped cream, and the iconic chocolatey flavor of Oreos creates a dessert that is sure to impress your friends and family.
If you’re looking to elevate your Oreo Cheesecake Cups even further, consider adding some fun variations. You could incorporate different flavors of Oreos, such as mint or peanut butter, to give your cups a unique twist. For an extra layer of flavor, try adding a drizzle of chocolate or caramel sauce on top before serving. You can also garnish with fresh berries or a sprinkle of crushed Oreos for added texture and visual appeal. The possibilities are endless, and I encourage you to get creative!
As you prepare to make these delicious Oreo Cheesecake Cups, I invite you to share your experience with me. Did you try any unique variations? How did your friends and family react to this delightful dessert? I would love to hear your thoughts and any tips you might have for making these cups even better. Remember, cooking is all about experimenting and having fun, so don’t hesitate to make this recipe your own!
So, what are you waiting for? Grab your ingredients and get started on these scrumptious Oreo Cheesecake Cups today. I promise you won’t regret it! Whether you enjoy them as a personal treat or share them with loved ones, these cups are bound to become a favorite in your dessert repertoire. Happy baking!
Oreo Cheesecake Cups: A Delicious No-Bake Dessert Recipe
Enjoy these Oreo Cheesecake Cups, featuring a creamy cheesecake filling in a crunchy Oreo crust. Perfect for any occasion, these mini desserts are easy to make and sure to delight your guests!
Ingredients
- 1 package (15.5 oz) Oreo cookies
- 4 tablespoons unsalted butter, melted
- 2 (8 oz) packages cream cheese, softened
- 1/2 cup granulated sugar
- 1 teaspoon vanilla extract
- 1 cup heavy whipping cream
- 1/4 cup powdered sugar
- Chocolate syrup (for drizzling, optional)
- Additional crushed Oreos (for topping, optional)
Instructions
- Preheat your oven to 350°F (175°C).
- In a food processor, add the entire package of Oreo cookies and pulse until finely crushed.
- In a medium bowl, combine the crushed Oreos with the melted butter and mix until all crumbs are coated.
- Line a muffin tin with cupcake liners.
- Evenly distribute the Oreo mixture into the bottom of each cupcake liner, pressing down firmly to create a solid crust.
- Bake the crusts for about 10 minutes, then remove from the oven and let cool completely.
- In a large mixing bowl, beat the softened cream cheese with an electric mixer on medium speed until smooth (about 2-3 minutes).
- Add the granulated sugar and vanilla extract, and continue to beat until fluffy (about 2 minutes).
- In a separate bowl, whip the heavy cream until soft peaks form (about 3-5 minutes).
- Gently fold the whipped cream into the cream cheese mixture using a spatula.
- Optionally, fold in some crushed Oreos for added texture.
- Fill each cupcake liner with the cheesecake filling, smoothing the tops with a spatula.
- Cover the muffin tin with plastic wrap or aluminum foil and refrigerate for at least 4 hours, or overnight.
- Carefully remove the cheesecake cups from the muffin tin by lifting the cupcake liners.
- Transfer to a serving platter or individual plates.
- Drizzle with chocolate syrup and sprinkle with crushed Oreos if desired.
- Serve immediately or keep refrigerated until ready to serve.
Notes
- Feel free to customize the recipe by adding different flavors or toppings to suit your taste!


Leave a Comment